Spell-checking
Document Editor allows you to check the spelling of your text in a certain language and correct mistakes while editing. In the desktop version, it's also possible to add words into a custom dictionary which is common for all three editors.
First of all, choose a language for your document. Click the  Set Document Language icon at the status bar. In the window that appears, select the necessary language and click OK. The selected language will be applied to the whole document.

To choose a different language for any piece of text within the document, select the necessary text passage with the mouse and use the  menu at the status bar.
To enable the spell checking option, you can:
- click the
 Spell checking icon at the status bar, or
 - open the File tab of the top toolbar, select the Advanced Settings... option, check the Turn on spell checking option box and click the Apply button.
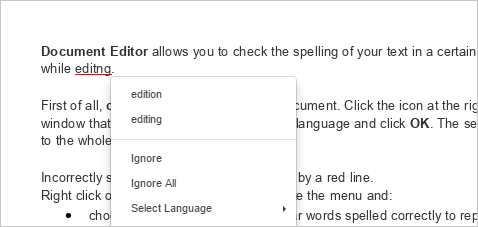
Incorrectly spelled words will be underlined by a red line.
Right click on the necessary word to activate the menu and:
- choose one of the suggested similar words spelled correctly to replace the misspelled word with the suggested one. If too many variants are found, the More variants... option appears in the menu;
- use the Ignore option to skip just that word and remove underlining or Ignore All to skip all the identical words repeated in the text;
- if the current word is missed in the dictionary, you can add it to the custom dictionary. This word will not be treated as a mistake next time. This option is available in the desktop version.
- select a different language for this word.

To disable the spell checking option, you can:
- click the
 Spell checking icon at the status bar, or
 - open the File tab of the top toolbar, select the Advanced Settings... option, uncheck the Turn on spell checking option box and click the Apply button.