Merge cells
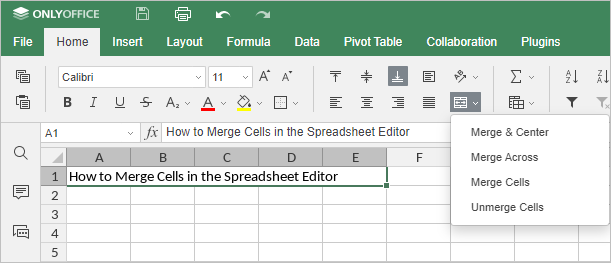
If you need to merge cells to position your text better (e.g., the name of the table or a long text fragment within the table), use the Merge tool of ONLYOFFICE Spreadsheet Editor.
Type 1. Merge and Align Center
-
Click on the cell at the beginning of the needed range, hold the left mouse button, and drag until you select the cell range you need.

The selected cells must be adjacent. Only the data in the upper-left cell of the selected range will remain in the merged cell. Data in other cells of the selected range will be deleted.
-
Go to the Home tab and click on the Merge and center icon .

Type 2. Merge Across
-
Click on the cell at the beginning of the needed range, hold the left mouse button, and drag until you select the cell range you need.

-
Go to the Home tab and click on the arrow next to the Merge and center icon to open a drop-down menu.

-
Choose the Merge Across option to align the text left and preserve the rows without merging them.

Type 3. Merge Cells
-
Click on the cell at the beginning of the needed range, hold the left mouse button, and drag until you select the cell range you need.

-
Go to the Home tab and click on the arrow next to the Merge and center icon to open a drop-down menu.

- Choose the Merge Cells option to preserve the preset alignment.
Unmerge Cells
-
Click on the merged area.

-
Go to the Home tab and click on the arrow next to the Merge and center icon to open a drop-down menu.

- Choose the Unmerge Cells option to bring the cells back to their original state.